Introduction
Finding virtual offsets provides us a way to access functions in the games that we otherwise would not be able access. Using either SDKCalls, Extensions, or MM:S Plugins, we can make use of these virtual offsets to give us a massive amount of functionality that is not included with Sourcemod out of the box.For this example, you will need a copy of IDA Disassembler. We will be using IDA Pro 5.2 but any of the more recent versions should work fine (will not work with the free version). You will also need to grab this linux_vtable_dump.idc file and install it into your IDA/idc/ directory. Lastly, you will need to get a copy of the Linux server file for the game you want to find the offsets for. This will generally be in the 'bin' directory of your game folder and the file will be named server.so (use server_i486.so for older games that do not have server.so) along with some other similar files.
Finding Offsets
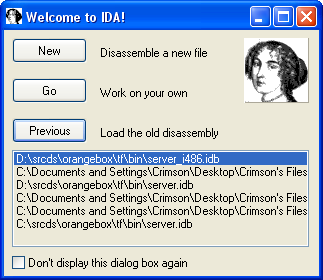
Disassemble the Linux Server:Now that your files are setup appropriately, you can start the IDA Disassembler. On the Welcome to IDA box that opens initially, you will want to click the "New" button. This will allow us to add a new file for it to disassemble. After you initially disassemble the file, you will be able to reload it without any hassle by using the 'Previous' button and selecting the file on this screen.

After you click the New Button, the application will open. It will prompt you to choose a specific type of file from a box, however you can just close this as we do not need it. The screen should now say "Drag a File Here to disassemble". Open your folder containing the server_i486.so and drag drop this file in now. This will start the disassembling process, and depending on hardware, can take anywhere from 15-30 minutes to completely finish.
Find the Virtual Table::
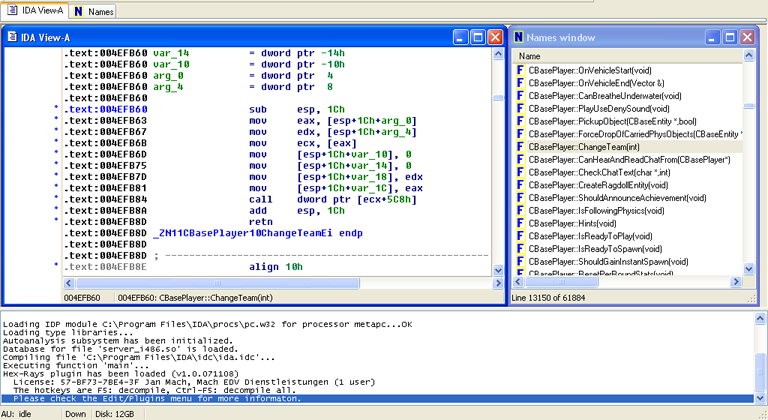
You will want to be in IDA View-A and make sure you can see both the IDA View-A window as well as the Names window to make this easier on yourself. For this example, we will be finding the Virtual Offset for the function CBasePlayer::ChangeTeam. Our first step is to locate this function in the Names window. (The search hotkey combination is Alt+T) Now once you find this function, in the Names window, double click it, and it should select a line in the IDA View-A window that looks something similar to this.

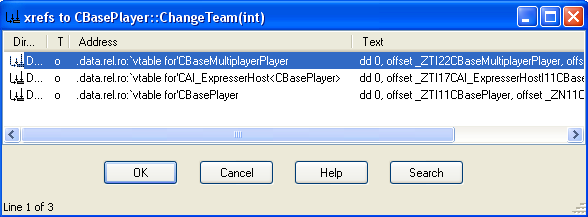
From here we are going to want to go to the Jump Menu up top, and select Jump to Cross Reference. (The hotkey is CTRL+X) This will find the reference files for this paticular function. You will want to make sure that you find the line with `vtable at the start of it, as this will be the Virtual Table file that contains the offsets for us.

Save the Virtual Table file::
Now double click the line that says `vtable for'CBasePlayer and you will be brought back to the IDA View-A window. This time your cursor will be on the line with the VTable information. You have now successfully located the file you need, and you are ready to get the offsets. Making sure that your cursor is still somewhere in that line, go to...
File -> IDC File
and browse to the linux_vtable_dump.idc file that we placed in the IDA directory earlier. Load this file and click OK, and it will now ask you to enter a number for VTable's entries to ingore indexing. Setting this to 0 will output a file listing the exact Linux offsets, setting this to 1 will output a file which estimates the windows offsets (general rule is windows offset = linux offset - 1 but this isn't always the case). It will run your IDC script file, and give you another dialog box. This time it wants you to choose the location for the dump file. Browse to your desktop, and enter anything for the File Name box, and click Save. You now have a text file on your desktop will all of the CBaseEntity offsets inside of it that you can use.
Conclusion
That is all there is to it. Keep in mind that even though this is the Linux server file, the offsets listed in the dump file are for windows. You will just need to add +1 to these offsets to obtain the Linux offset. Make sure that you are using the Linux server file when you disassemble as well, because the Windows server does not have symbols or readable names, and you will not be able to find the offsets with it (unless you have the .pdb files for it, which only the Developers of the Game / Mod should have).Windows Info
[07:38pm]dvander word it in such a way that I can copy/paste it into the wiki [07:38pm] lol, i dunno if i can do that in IRC. basically, there are two tricks [07:39pm] the first is if you know assembly really well [07:39pm] you can look at the SDK for a function that calls something you are interested in [07:39pm] find a string in that function, or a string in a function in its cross-reference graph [07:40pm] for the former case, find the same string in the windows binary and use the xref graph to find the right function [07:40pm] for the latter case, say a function with a string in it calls the function that has what you want [07:40pm] you find the first function, then read through it until you get to what you want [07:41pm] once you have the actual function you're looking for [07:41pm] you use the xref graph to find its reference in the data section [07:41pm] it will be in a large table - the virtual table [07:41pm] and you can compute its offset from the base of that table [07:42pm] the other trick is a bit easier, sometimes [07:42pm] you compile the SDK on windows [07:42pm] turn on the MSVC feature that dumps assembly [07:42pm] and poke around, using educated guessing


